Create a contract or waiver
Create reusable contract and waiver templates in the Documents section, then find all signed copies in one list.
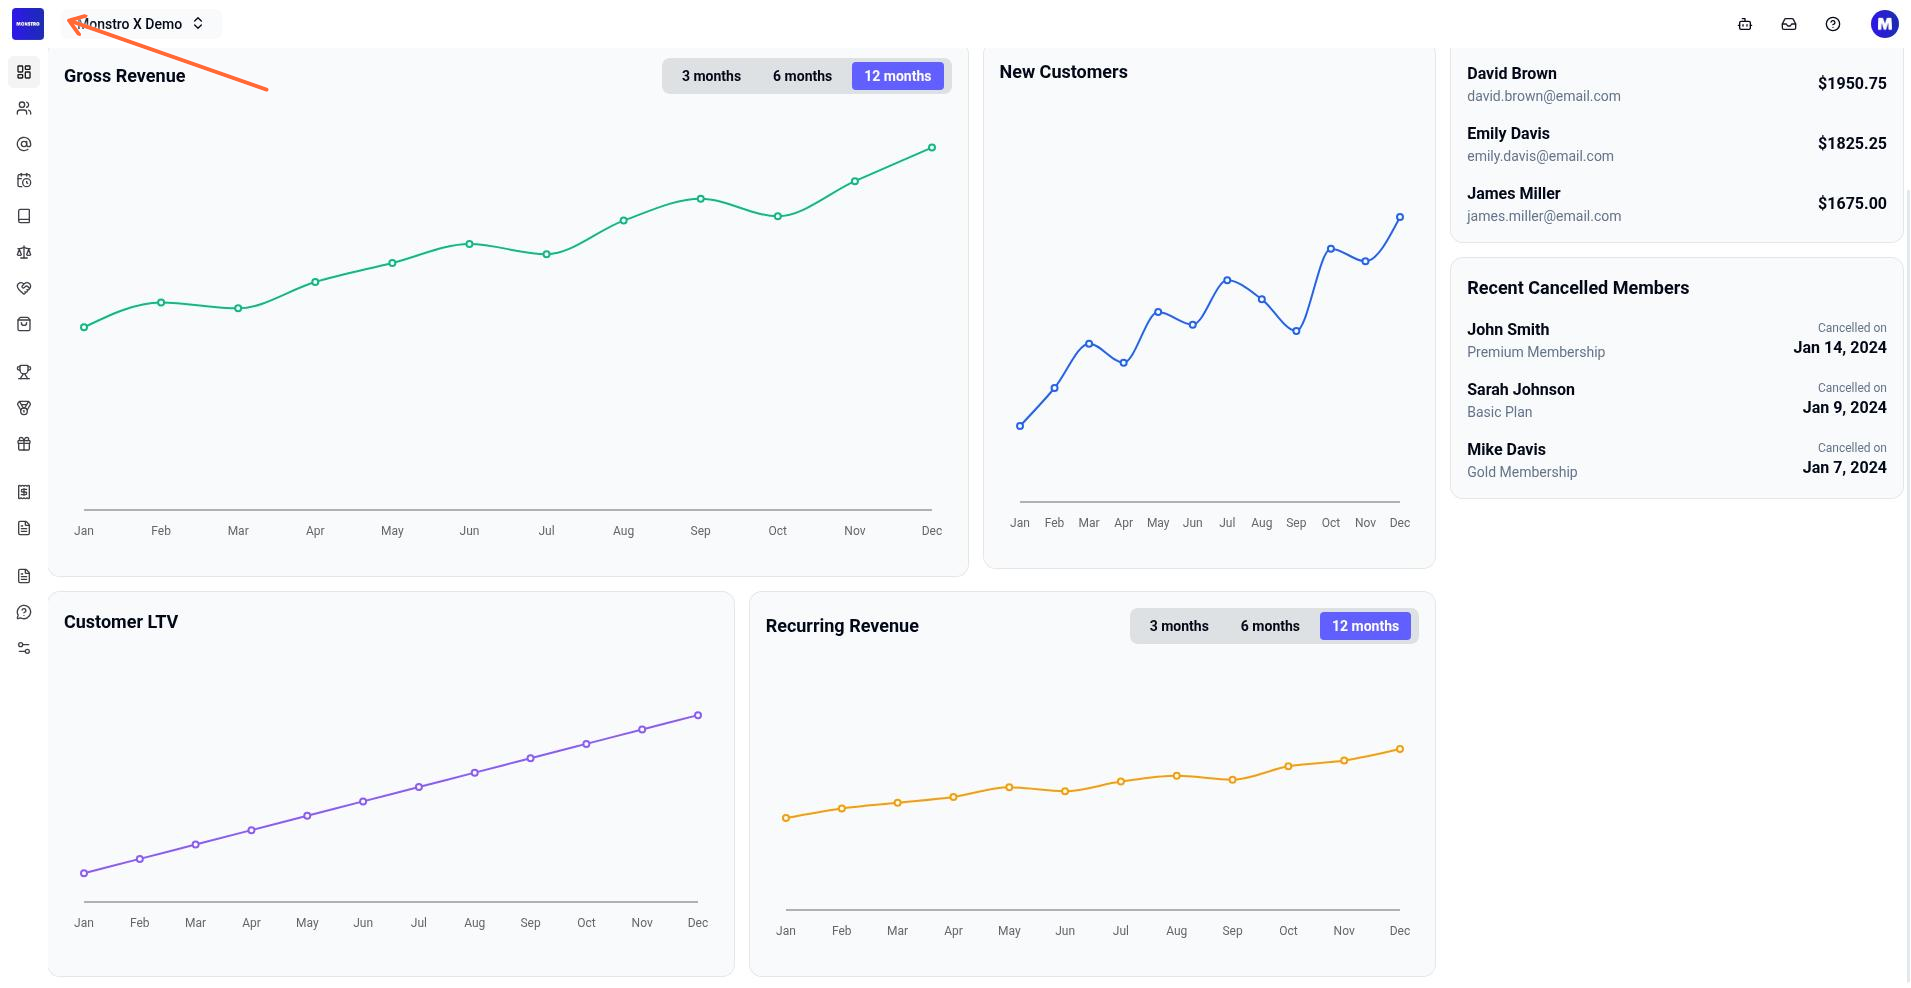
Navigate to Documents
From the dashboard, click your location card, then choose Documents (scales-of-justice icon) in the left sidebar.
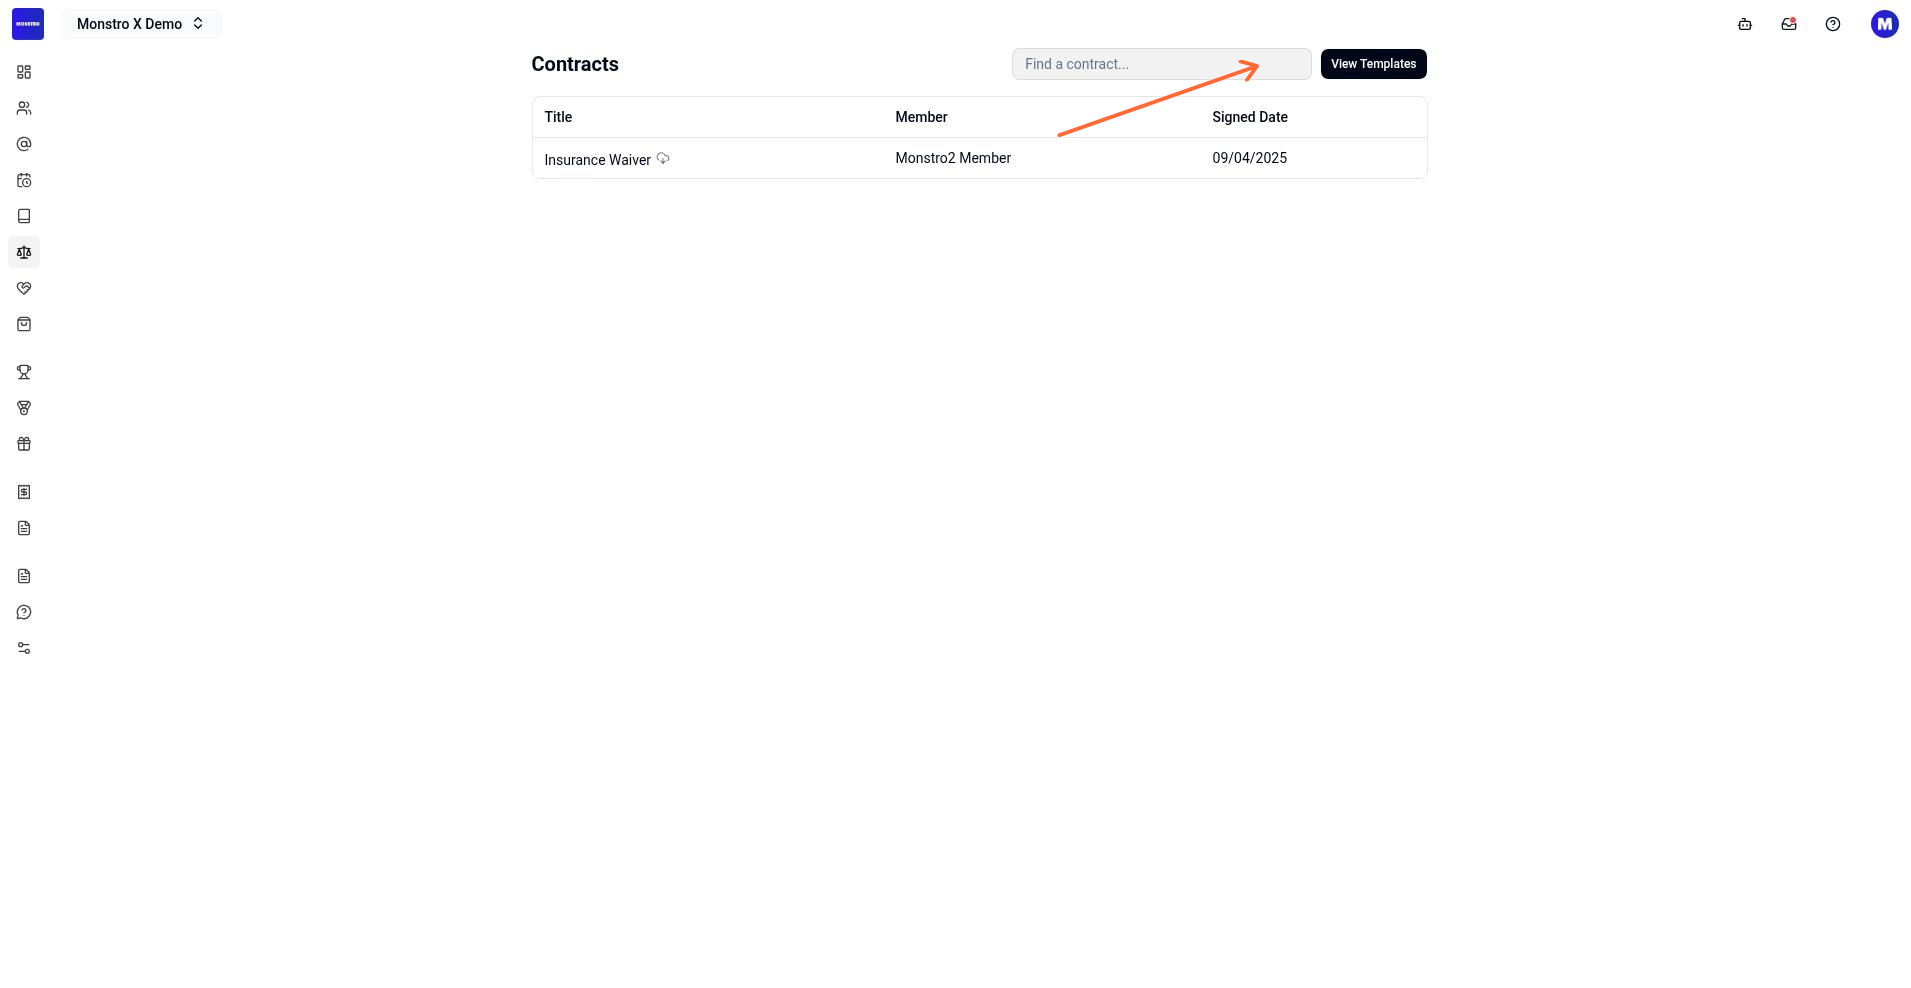
The Documents page opens on the signed contracts list. To create or edit a template, click View Templates at the top right.
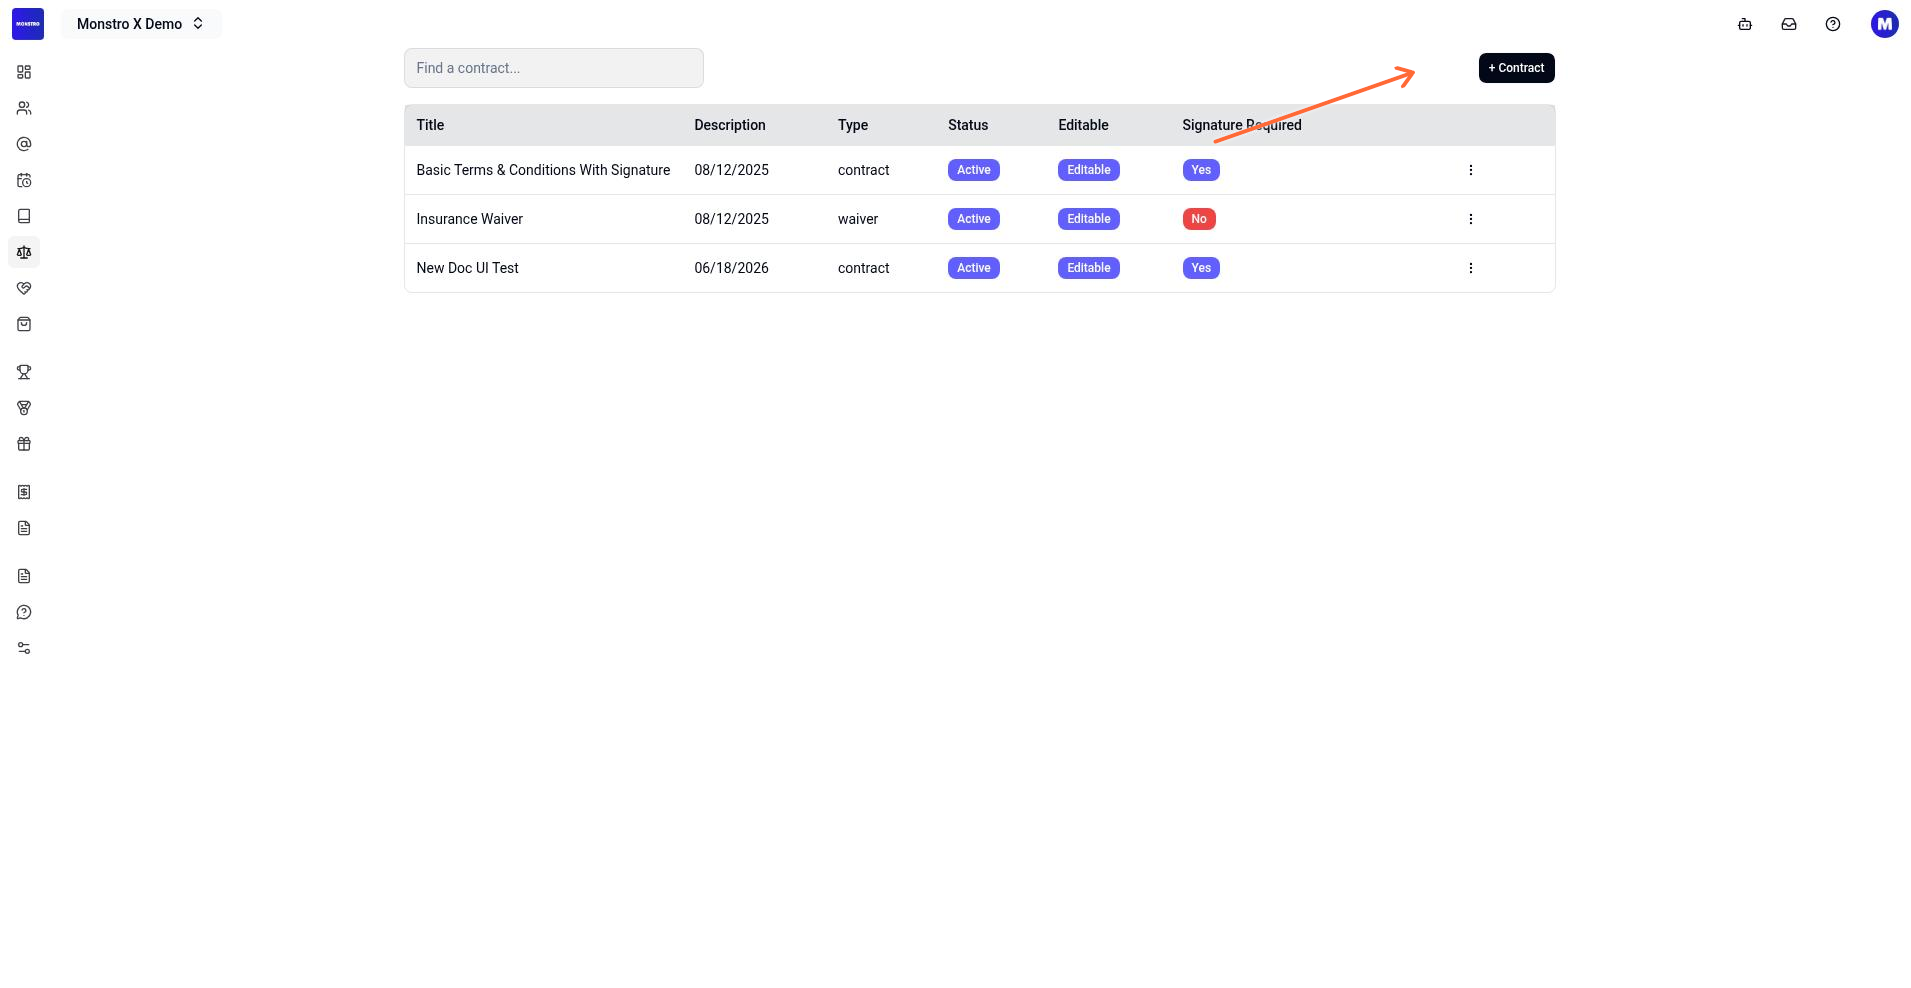
Create a new template
On the templates page, click the + Contract button in the top right of the list.
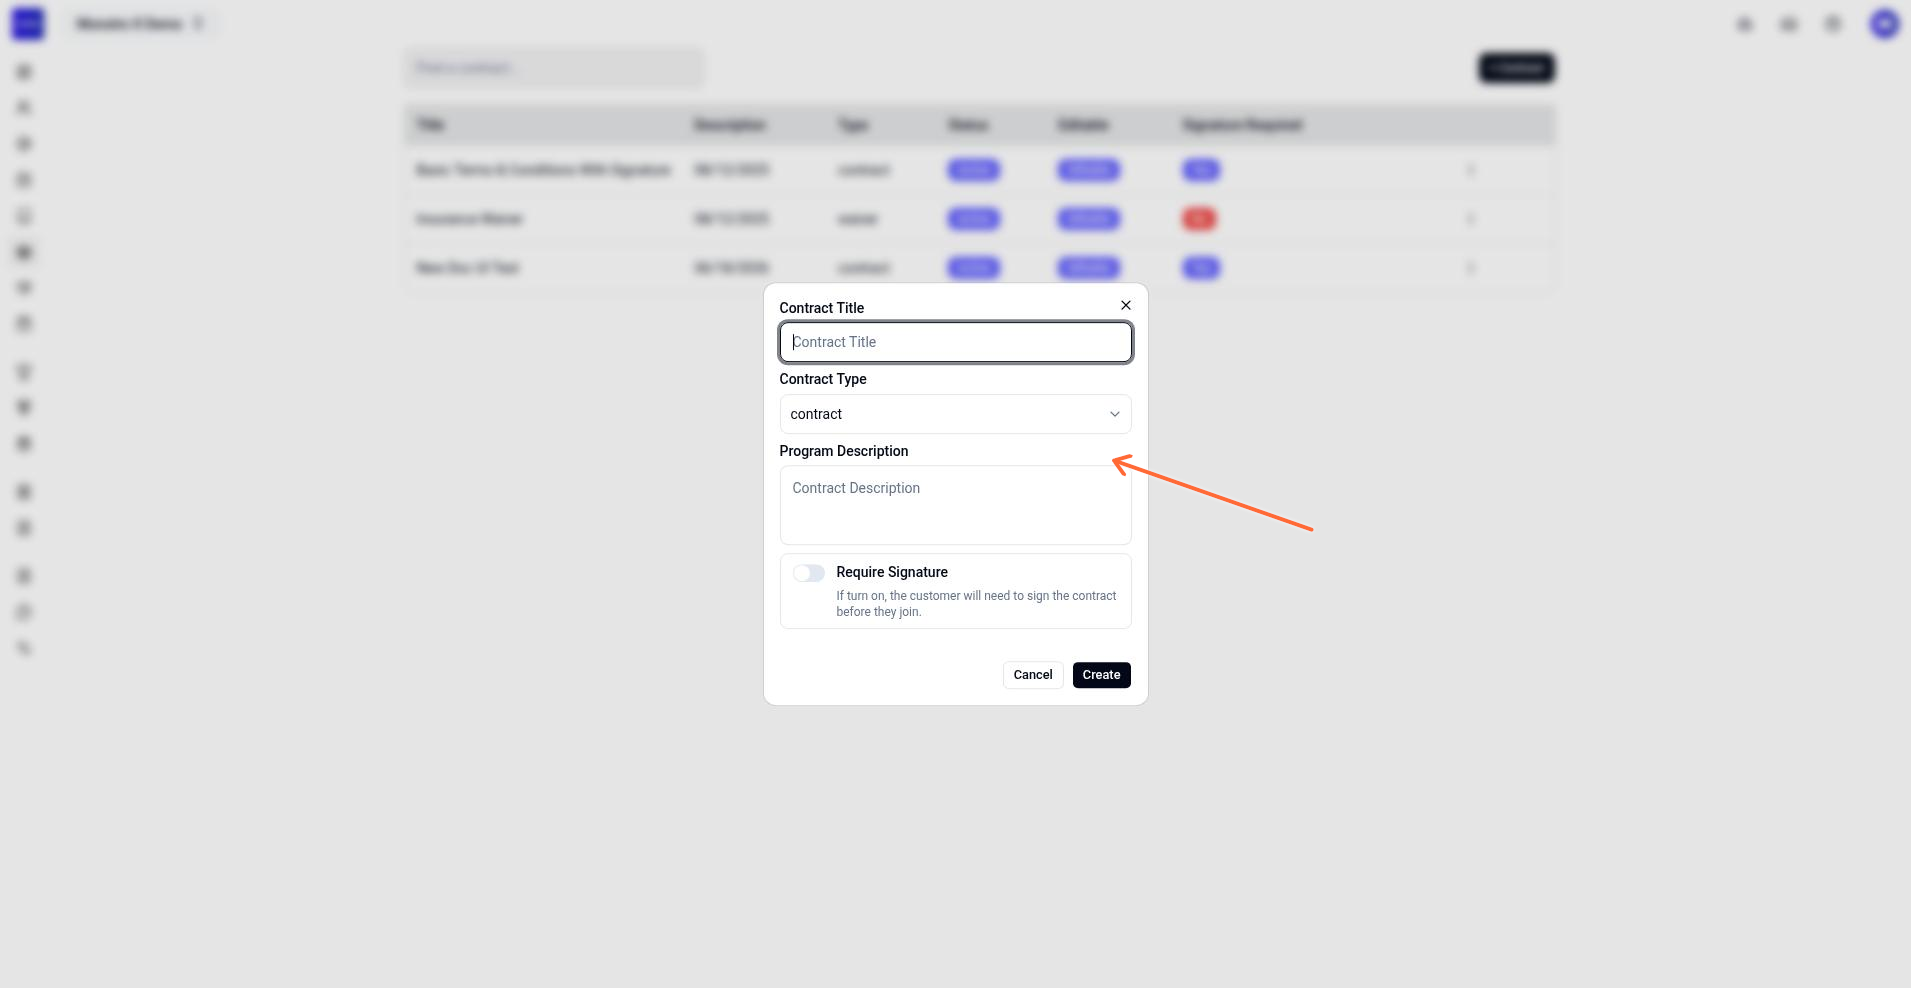
Enter a Contract Title.
Choose a Contract Type:
contractorwaiver.Add a Program Description to explain what the document covers.
Toggle Require Signature on if members must sign the document.
Click Create to open the builder.
Edit the document body
The builder page opens with a rich text editor, a left sidebar for the table of contents, and a top menu for formatting and saving.
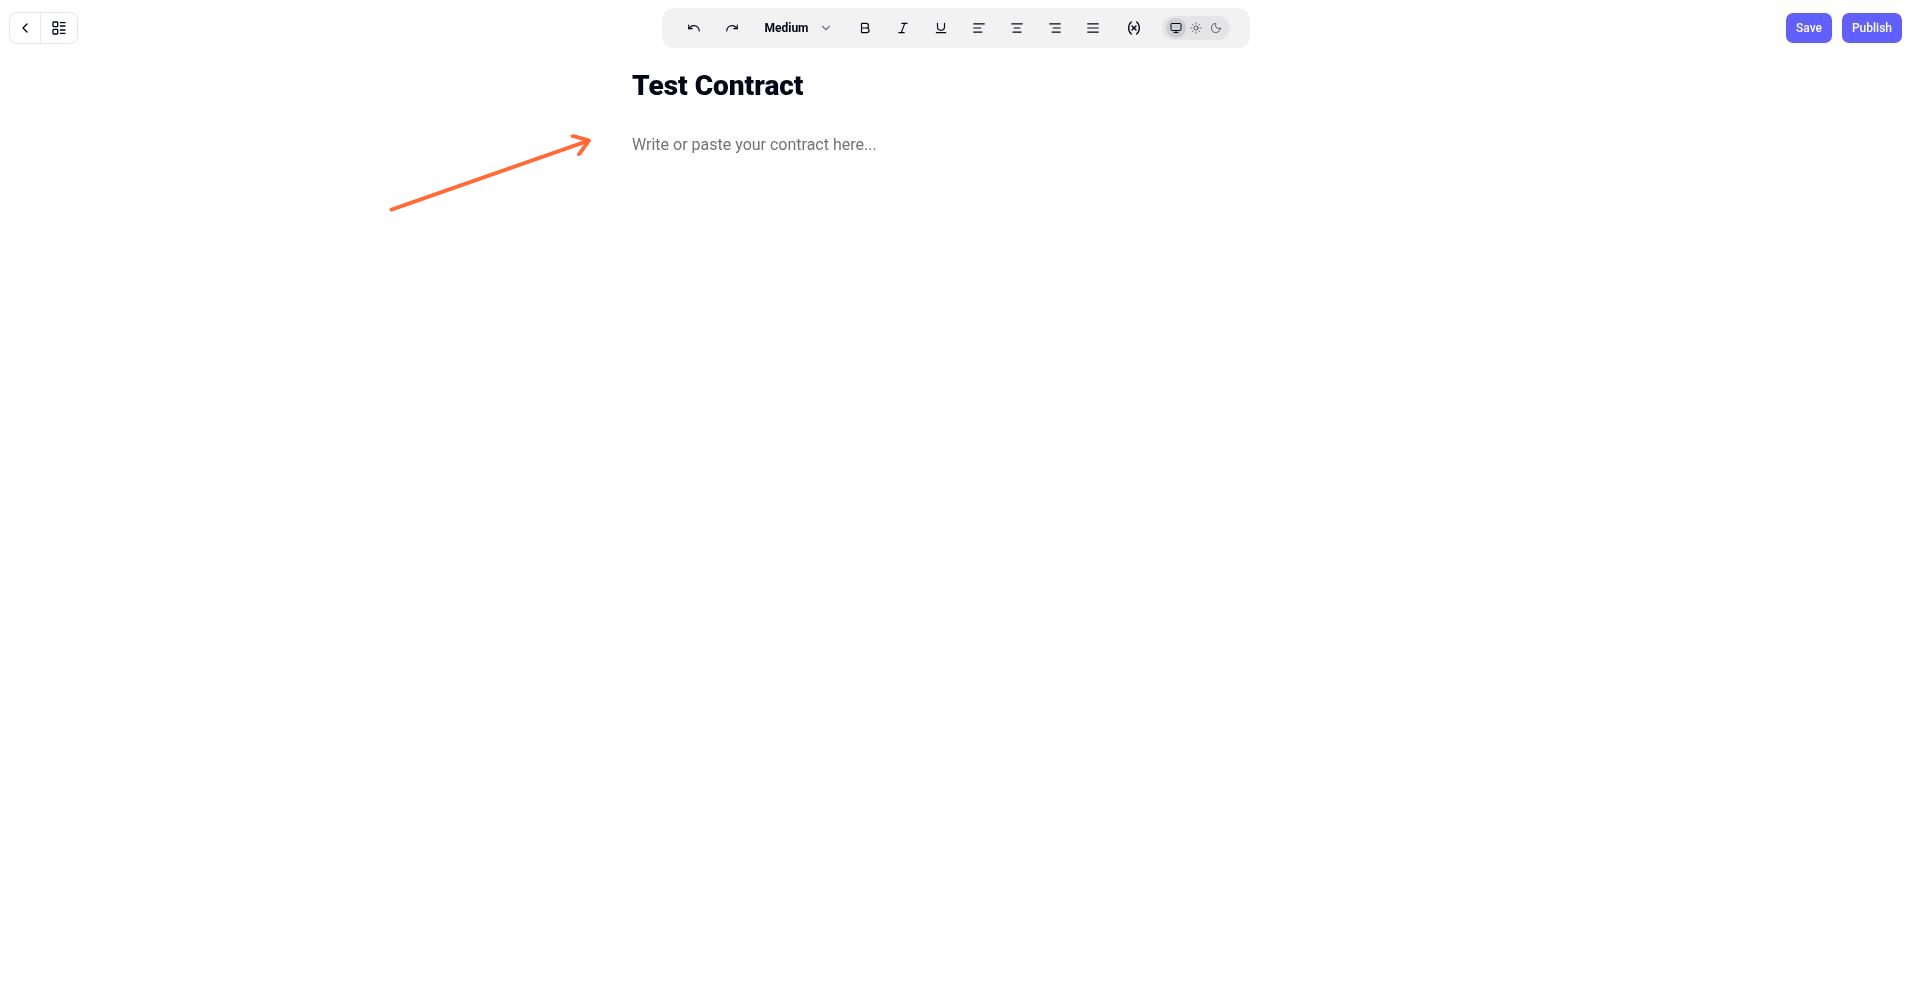
Edit the title in the textarea at the top.
Type or paste the contract or waiver text in the main editor.
Use the top menu to add headings, lists, or formatting.
Save or publish the template when finished.
Find signed documents
After a member signs a document, return to the Documents page to view it. The signed list shows the Title, Member, and Signed Date for each completed document.
Signed documents are saved as downloadable PDFs that include:
Terms and conditions
Effective date
Member name and signature line
An electronic-signature validity statement
To return to the templates list from the signed-documents page, click View Templates.
Monstro X supports both contracts and waivers as document types. Use the same creation and editing workflow for either.